Jira has emerged as an important tool for teams across various industries. And there is the Jira workflow, a powerful feature that orchestrates the journey of issues from inception to completion.
This guide aims to provide a comprehensive understanding of Jira workflows, offering valuable insights for both novices and seasoned users. Not only that, you can also optimize your team’s efficiency and project management capabilities.
Table of Contents
What is Jira workflow?
A Jira workflow is a set of statuses and transitions that an issue goes through during its lifecycle. It’s a framework that dictates how a task moves from inception to completion, representing the process in which your team works.
Moreover, the workflow can be customized to suit different types of projects, be it software development, marketing campaigns, or HR processes.
In the most basic workflow, you can find the statuses as:
- To Do: After creating an Issue, you can reflect this new task in such status accordingly.
- In Progress: This status marks the moment you start working on a specific task.
- Done: Once you complete the task, you can mark it in the “Done” status.

In a nutshell, statuses in Jira are not just labels but represent significant phases in the life of an issue. They also signify where an issue currently stands in the workflow process.
Additionally, you can freely customize these Jira workflows with custom statues. For example, a software development team might add statuses like “Code Review,” “QA Testing,” or “Awaiting Deployment” to reflect their specific process stages.
Typically, you will find these statuses of a Jira workflow as columns in your Jira board, visualizing the progress of issues through the workflow.
Elements of Jira workflow diagrams
The key elements of a Jira workflow are essential components that define how issues are processed and managed within the Jira system. Understanding these elements is crucial for effectively using Jira for project management and issue tracking.
1. Statuses
Status in Jira workflow represents the various stages that an issue, such as a task or bug, passes through from inception to resolution. As mentioned above, these are not just labels but signify the current phase of an issue.
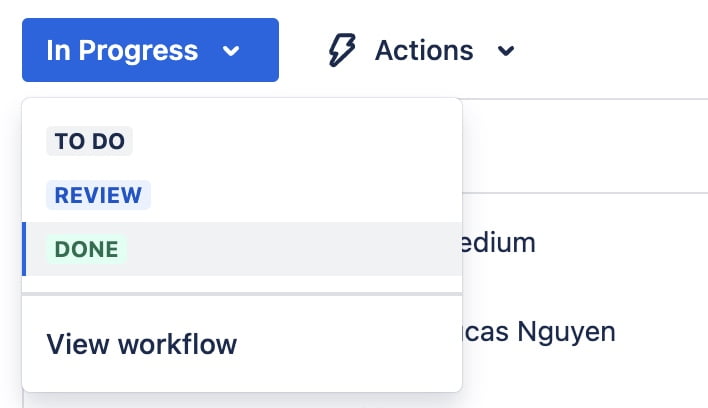
Besides, they can also be extensively customized to reflect the unique stages of your team’s process. The ability to tailor these statuses allows teams to accurately map their real-world processes within Jira, providing clarity on the progress and state of each issue.
2. Transitions in the Jira workflow diagram
Transitions are the connectors between statuses in a Jira workflow, defining the path that an issue takes as it progresses. Each transition represents a specific action, such as moving an issue from “To Do” to “In Progress” or from “In Progress” to “Done.”
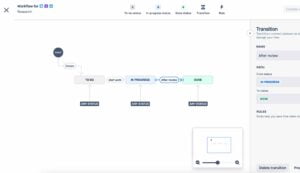
Additionally, you can configure transitions with various properties, including conditions that must be met for the transition to be available. You can also use validators that ensure meeting certain criteria before completing the transition, and post-functions that trigger specific actions automatically after the transition.
This comprehensive set-up ensures that the progress of an issue is not just a change in status, but a well-defined and controlled process step.
You can view these transitions of the Jira workflow diagram from the issue status menu. Besides, you can also use apps like Mocky to bring your own Jira flowchart to each issue.
3. Assignees
Within the Jira workflow, an assignee is the individual responsible for an issue at a particular stage. Assignees are crucial for task accountability and management.
As an issue progresses through various statuses, its assignee can change to reflect who is responsible for the next step. For example, a developer might be assigned to an issue in the “In Progress” status, while a quality assurance analyst might be assigned once it moves to “QA Testing.”
This dynamic allocation of responsibility ensures that each issue is always under the purview of the most relevant team member at each stage.
4. Resolve the issue in Jira workflow
Resolving an issue in Jira marks the conclusion of an issue. They are used to indicate how an issue was resolved or why it was closed.
Common resolutions include ‘Fixed’, ‘Won’t Fix’, ‘Duplicate’, and ‘Cannot Reproduce’. The resolution is a critical aspect of an issue’s lifecycle as it provides closure and clarity on the outcome of the issue. It’s especially important for historical data analysis and reporting, allowing teams to assess how issues are typically resolved and identify areas for process improvement.
5. Conditions, Validators, and Post-functions
Conditions, validators, and post-functions add depth and control to transitions in a Jira workflow. Conditions determine if a transition is available based on specific criteria, such as user roles or issue fields.
Meanwhile, Validators ensure that all necessary conditions or data inputs are met before an issue can transition to the next status. Post-functions perform automated actions following a transition, like updating issue fields or sending notifications.
These features collectively ensure that transitions are not only actions but controlled processes that adhere to the team’s operational rules and standards.
6. Use Screens to customize user interaction
Screens in Jira define the information collected from users during various issue operations, such as creating, editing, or transitioning an issue. They can be customized to include different fields based on the specific needs of a status or transition.
For example, the screen for creating an issue might include fields for summary and description, while the screen for resolving an issue might include additional fields like resolution type or resolution details.
This customization ensures that the necessary information is captured at each step, enhancing data accuracy and process efficiency.
7. Workflow Schemes: Assigning Jira workflows to projects
Workflow schemes in Jira are a powerful feature that links workflows to specific projects and issue types. They enable the application of different workflows to different types of issues within the same project.
For example, a ‘Bug’ might follow a different workflow than a ‘Story’ or ‘Task’ within the same project, reflecting the distinct nature and handling requirements of each issue type.
Workflow schemes provide the flexibility to tailor the workflow experience to the diverse needs of various teams and projects.
8. Automate Jira workflow actions with Triggers
You can use Triggers in Jira to automate certain actions within a workflow, often in response to external events. For example, a trigger might automatically transition an issue from ‘Open’ to ‘In Progress’ when a team member commits code to a repository linked to that issue.
Additionally, Triggers help in reducing manual intervention, ensuring timely updates to issues, and fostering seamless integration with other tools and systems used alongside Jira.
How to create a Jira workflow diagram
To create a Jira workflow, follow these simplified steps, and refer to a Jira workflow diagram for visual guidance:
- Access Jira Administration: Log into Jira, click the cog icon, and select “Issues” under Jira settings.
- Open Workflow Settings: Navigate to the “Workflows” section in the Issues menu.
- Create a New Workflow: Click “Add Workflow,” and enter a name and description.
- Design the workflow: Use the graphical workflow designer to add statuses (e.g., Open, In Progress, Done) and create transitions between them. Configure transitions with conditions, validators, and post-functions. Optionally, you can also add screens to transitions.
- Save and publish: Save your designed workflow and publish it to make it active.
- Associate with a Workflow Scheme: In the Workflow Scheme, assign your workflow to specific issue types.
- Assign to a project: In your project settings, select “Workflows” and apply the new workflow scheme.
A Jira workflow diagram, or Jira flowchart, will help visualize the flow from one status to another, providing a clear overview of the entire process. This visual tool is especially useful for ensuring that your workflow matches your team’s operational needs.
For more information about visualizing this diagram, you should visit our article on How to view a workflow diagram for Agile product development.
Common workflow challenges and solutions
Complex workflows, especially in large teams, can be challenging. Streamlining these workflows and automating repetitive tasks can boost efficiency. It’s also essential to manage workflow changes carefully to avoid disruptions, employing version control for better tracking and rollback capabilities.
In conclusion
This guide has provided a thorough understanding of Jira workflows, essential for enhancing project management efficiency. By mastering elements like statuses, transitions, and customizations, you can adapt Jira to your team’s specific needs.
Besides, the flexibility of Jira workflow also allows for tailored management of tasks, regardless of project size or complexity. Therefore, you can take advantage of the capabilities of Jira workflow to streamline your project management and achieve greater success in your endeavors.

